- Partition 1 contains Simple shadow objects (these are the objects that will cast shadow)
- Partition 2 contains Shadow objects (these are the objects that recieve Shadow)
- Partition 3 contains lights emiting shadow rays.
Lets start......

My scene contains two objects.
Cone will be the Simple Shadow (Shadow caster)
Grid will be Shadow (Shadow Reciever).
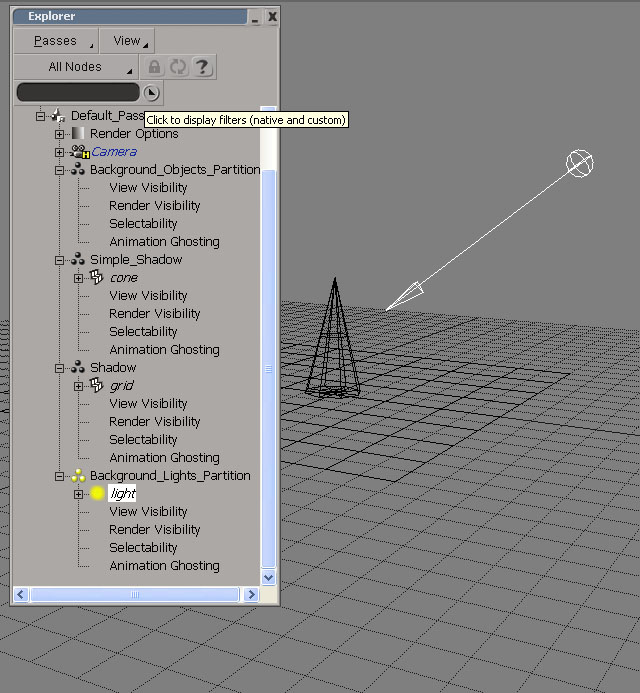
Simple Shadow contains Cone
Shadow contains Grid
Background Lights contains my light
Simple_Shadow
Add an overridre to the Simple Shadow partition.
Property>override
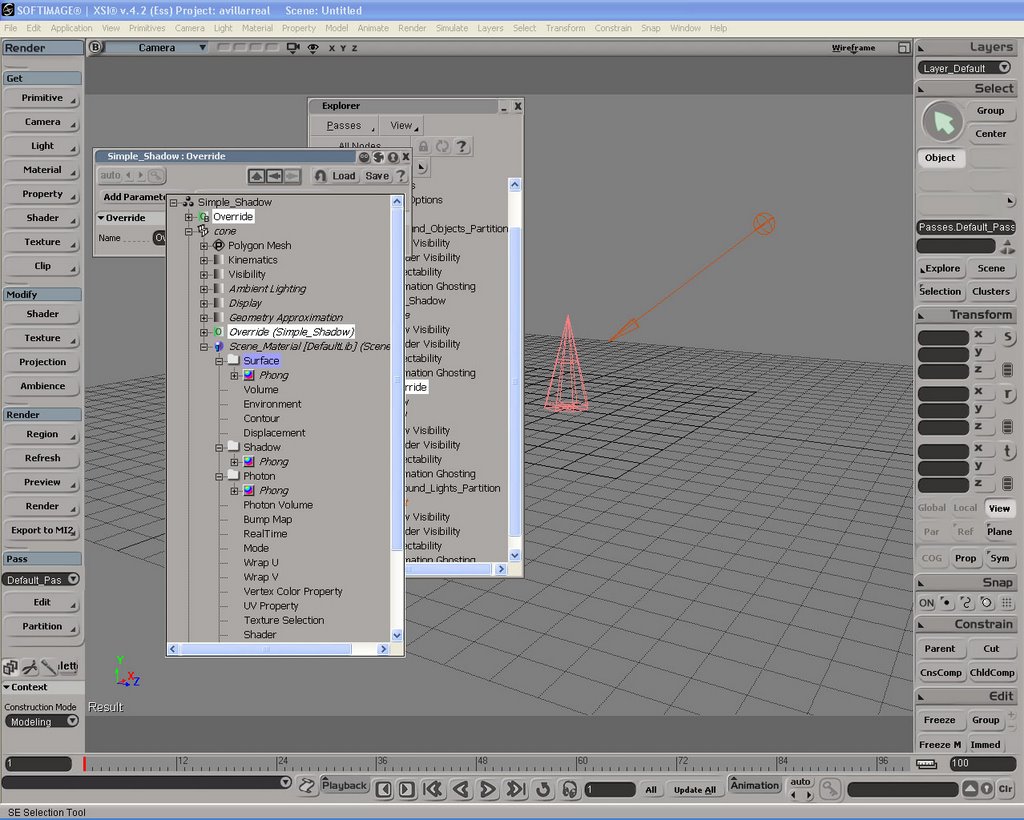
Add a material-suface parameter to the overide by selecting a surface node inside the shader.

Open the render tree by pressing 7.
Inside the render tree add a simple shadow node.
Nodes>illumination>Simple_shadow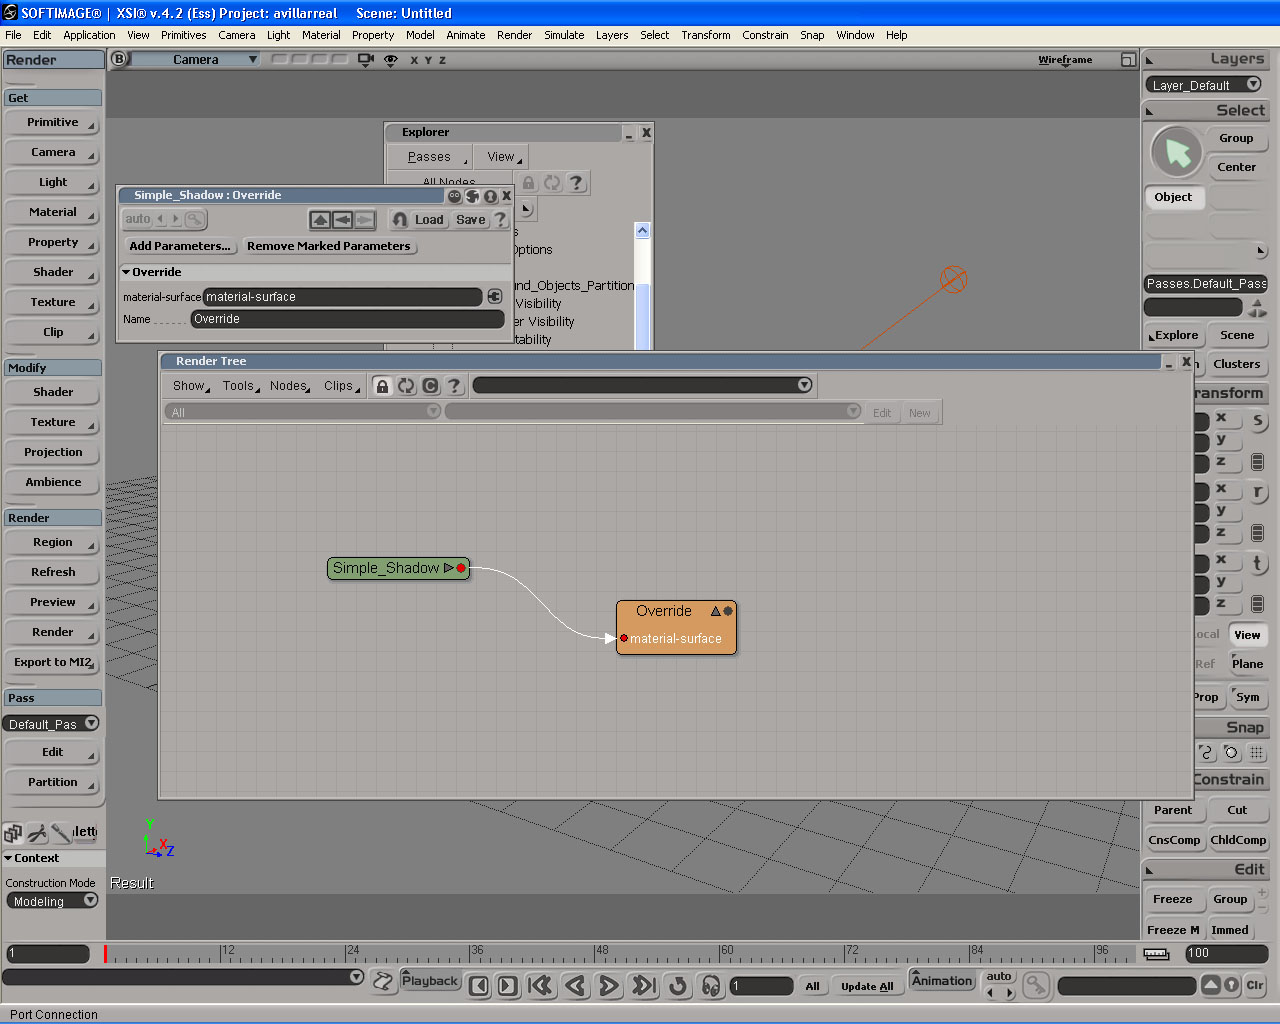
Connect the node to the override Material-surface imput.
Shadow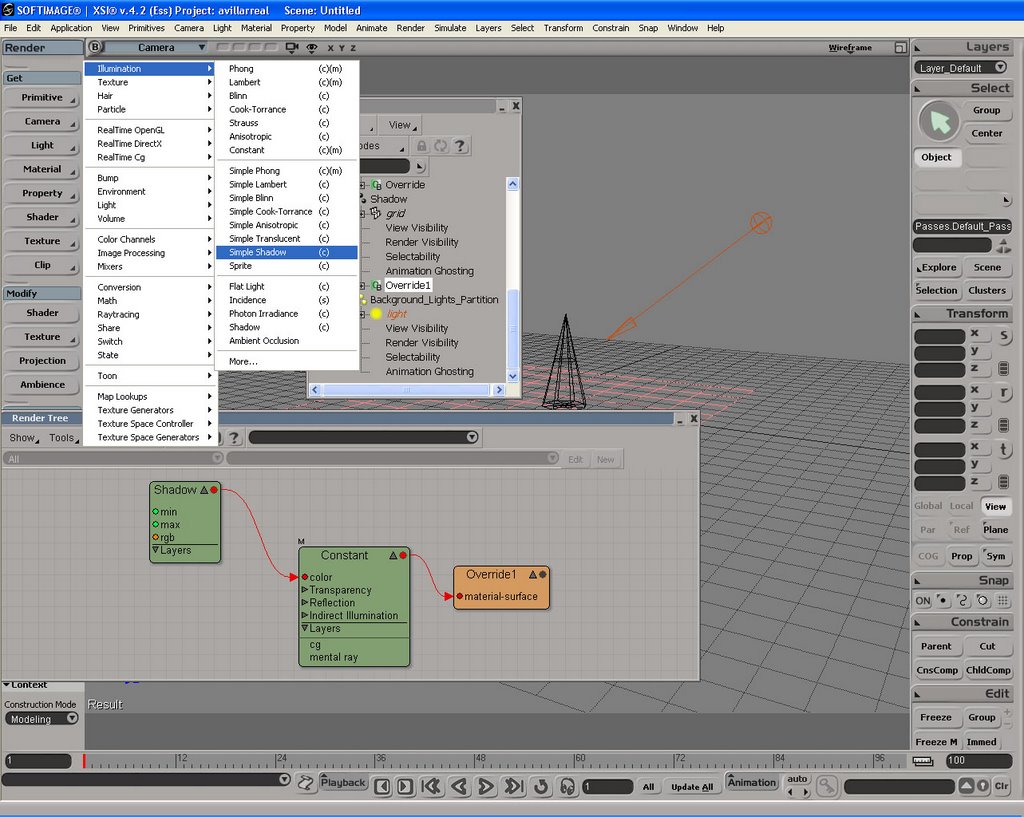
Now for the shadow partition you are going to repeat the first few steps.
*Add an overridre to the Shadow partition.
Property>override
*Add a material-suface parameter to the overide by selecting a surface node inside the shader.
*Open the render tree by pressing 7.
Inside the render tree add a Shadow node and a constant node.
Nodes>illumination>shadow
Nodes>illumination>Constant
Connect the Shadow node to the color imput for Constant and the constanct to the override Material-surface imput.
Things to note... I added a constant inbetween the shadow and the materia overdide to give light a stop point for the shadow rays.
Light
I am adding an overide to the light, because I ussually have many lights in the scene and the lights affect the enviroment. It is easier to override a light than to hide it in every pass. So I can use a light as part as my rig and also as my shadow light for my shadow pass.
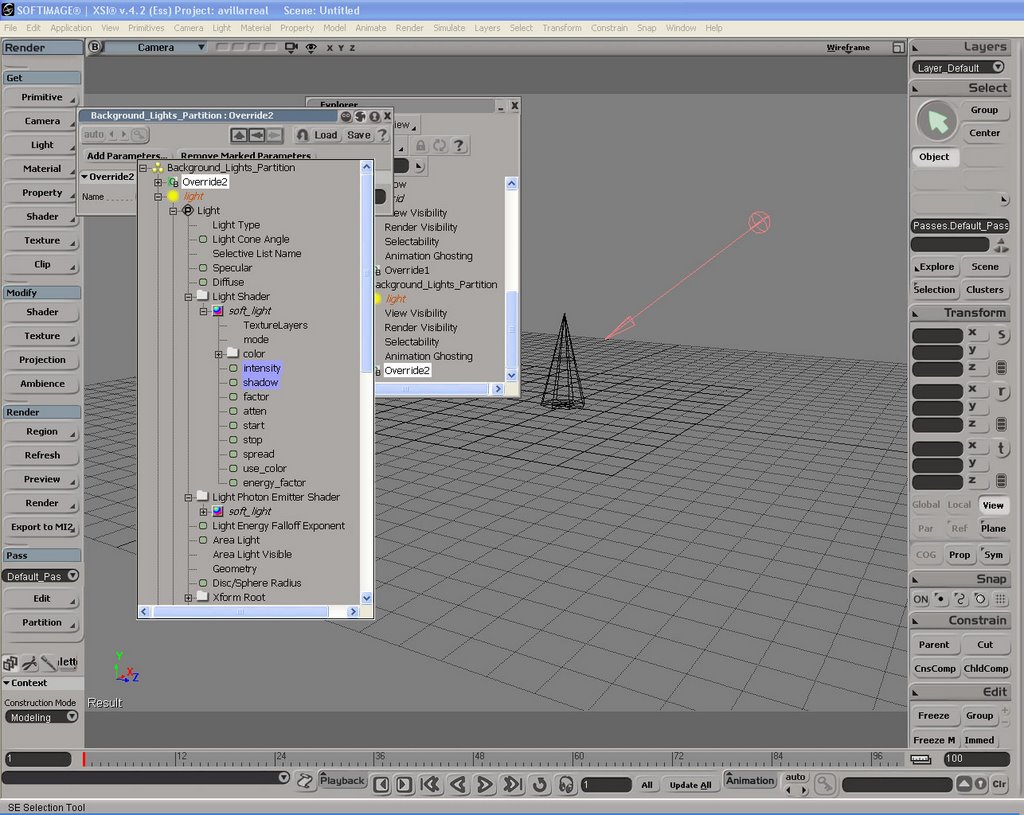
For the light partition in my shadow pass I add an intensity and shadow parameter.
When the dialog box comes up just say you want to add them as parameters.
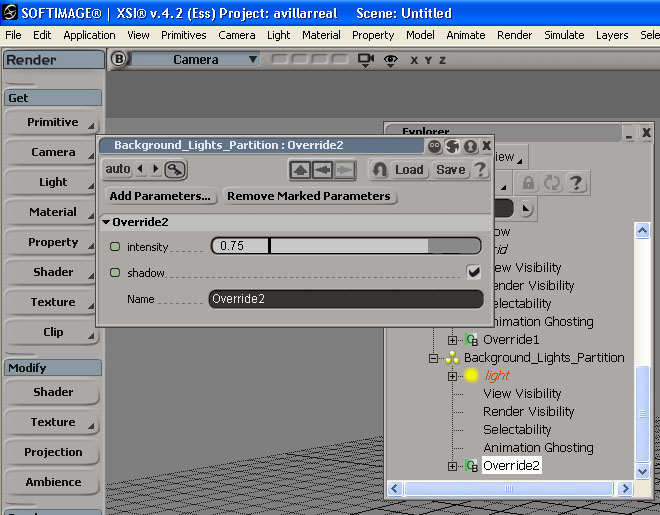
Add your intencity value and check shadows.
That will tell XSI to turn the shawdow rays in the light on.
Things to be concern about before rendering 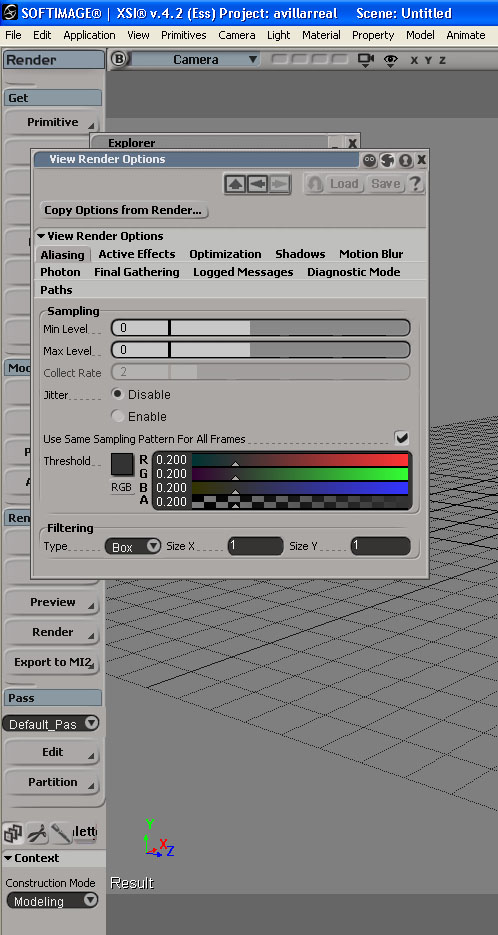 Antialiasing and Optimisation.
Antialiasing changes on how close the objec is or if your production has presets to fallow. I did a test a moment ago and in you loca computer a min of 1 an max of 3 will be fine for a shadow pass.

For Optimization it is recommeded by the great render gods to Use a diagnostis mode and depth to determine the proper BSP settings nevertheless I have found that a min of 20 and a max of 60. Will work.
Also make sure that you have enable ray tracing on in order for shadows to render.
For reflaction and refletion for a regular shadow presets are fine.
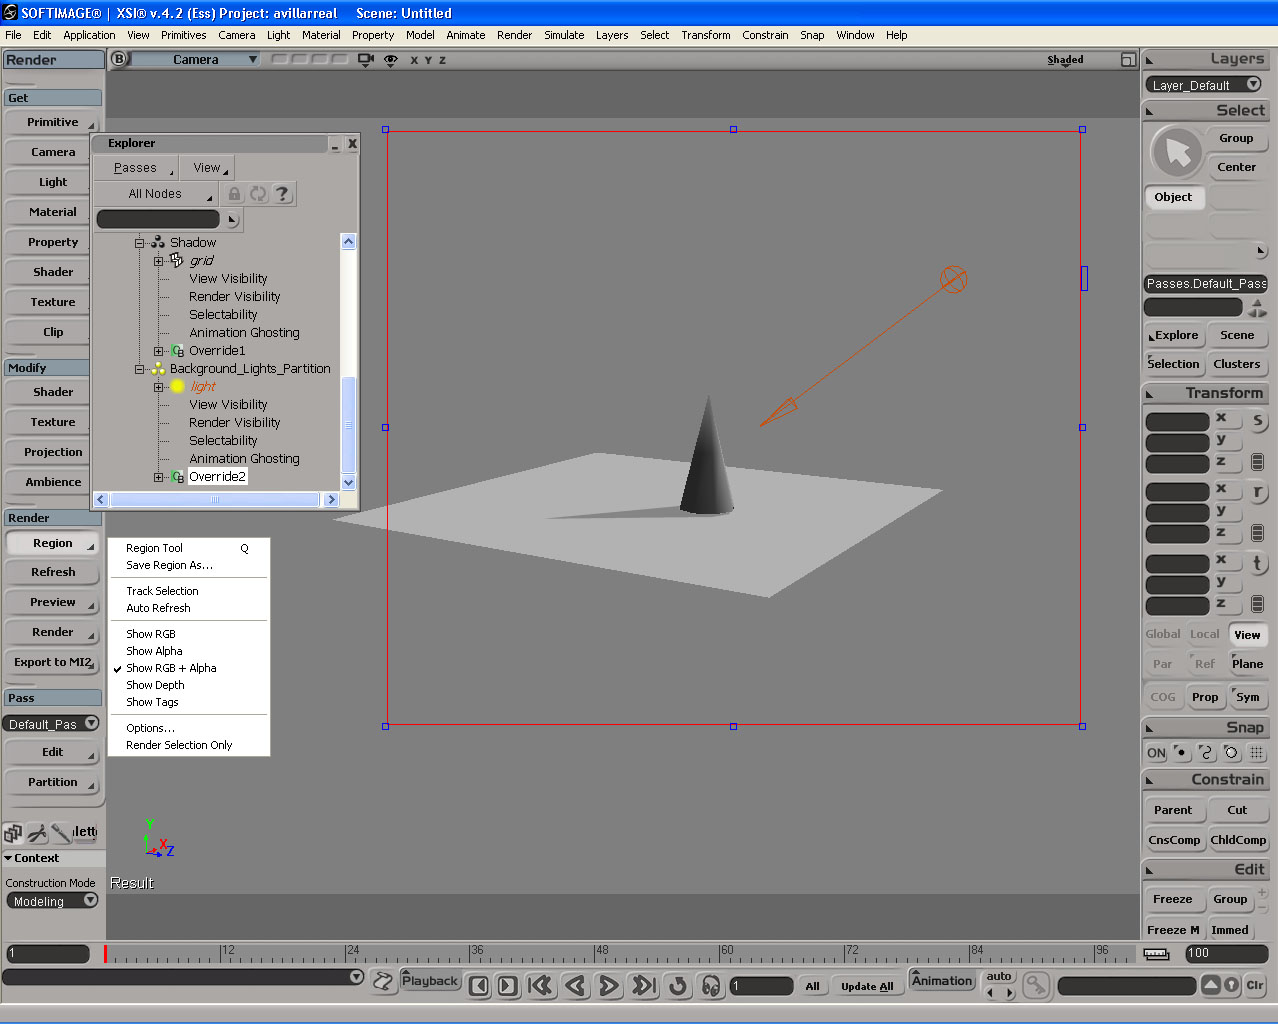
Now render........

Change your region settings to show alpha and you should be able to see shadows.
Now if you show alpha and rgb on shaded mode. this is what you will get.
Have fun and I how this was helpful.
If you have any question email me or leave me a coment.
4 comments:
WOW
clearly above and beyond what I expected. Thanks for going the extra mile for me and all the rest of us out here who are looking for tutorials on this.
-Randall
So, with a closer look at what you have written here, I can see that English is your second language. :)Your Enlgish got real loose towards the end there.
Seriously. I will let you know if the tutorial has been as easy as it was to read when the render finnishes. Thanks again for helping me.
-Cheers bro
This worked great.
After I rendered it (48 hours later) I plugged it in through Digital Fusion and it worked like a charm.
Thanks again.
Thanks, this was VERY uselful.
Post a Comment